I started writing this in September of 2014 just after my attempted thru hike from Stevens to Snoqualmie pass. For one reason or the other I kept putting off publishing it over and over. Well, it's been over a year and a half since that trip. . .I might as well publish the whole story. so here you go.
-------------------------------------------------------------------------------------------------------------------------
Here's the plan. Kyra was off to San Francisco for a series of job interviews so I thought this would be the perfect time to go on an extended backpacking trip. My objective. Solo 75 miles along the Pacific Crest Trail between Stevens Pass and Snoqualmie Pass. My timeline 4.5 days. Begin Wednesday, July 30th and come out early Sunday, August 4th. I had been training all year, purchased and tested new ultralight gear and was ready to go. On Go day, my pack, fully loaded with water and food was just a tad over 30 pounds. A bit heavy, but not too shabby.
Kyra had decided to accompany for part of the first day, which began at the base of Steven's Pass Ski resort. She would hike with me until around noon, then turn around and head back to the car as I advanced forward.
The hike up and over Steven's Pass actually wasn't very pretty, as I'm sure you can imagine. they were doing lots of tree thinning, brush clearing, and construction/updates to the ski hill so it was busy, noisy, and views of dirt, trucks, and construction crews.
The original plan was to stop and eat at Lake Susan Jane, just over the top of Stevens and on the backside. Lake Susan Jane is more accurately described as mud puddle Susan Jane so we decided to keep going to Josephine Lake.Unfortunately, the PCT doesn't actually go down to Josephine Lake, and there wasn't even a spot with a view of the lake to stop and eat lunch so we ended up simply sitting down and eating at the saddle near Swimming Dear Lake (again, no views).
After lunch, Kyra turned back and I hiked on. From the saddle it was mostly down hill about four or five additional miles to the first actual lake that I could SEE, Mig Lake. Mig lake was actually very pretty and is a was completely isolated when I was there. Apparently it is a bit too far to be very popular with the day-hike and overnight crowd.
Mig Lake also had fish, lots of fish. Perhaps because the lake had lots and lots and lots of insects. Fortunately they weren't too aggressive and didn't attack me so I had the opportunity to take several pictures of fish.
Full disclosure, with the new camera I also purchased a polarizing filter so this was an opportunity to play with that and get some cool pictures.
 |
| I was playing with my polarizing filter. So sue me. |
It is a short, one mile, jaunt from Mig Lake to Hope Lake. Hope Lake is very accessible and was really busy, even for a Wednesday afternoon. Given that it was so close to Mig I decided not to take a break, or take pictures and kept on hiking toward my goal for the day, Trap Pass. I had heard that there is a single tent site at the top of Trap Pass and that there are excellent views of stars. Also, I wanted to see if I could capture the nighttime glow of the massive forest fire near Leavenworth.
 |
I'm pretty sure that's Thunder Mountain, but don't quote me
as it may be Lake Lorraine Point
|
The trail finally opened up for the first time shortly after Hope Lake and I was rewarded with views out across the Trapper Creek Valley. The first real view of the hike was of the trail leading off toward what I'm pretty sure is Thunder Mountain, directly South of Trap Pass.
 |
Ohhhh! Look at all of that pretty pretty green
(S. facing slope between Hope and Trap Lakes)
|
This picture was taken at the same spot as the one above, just facing in the opposite direction. Look at all that green! Although it's not obvious from the picture, this is actually a decently steep slope.
The views continued to open as I traversed Southward along the ridge line that divides King and Chelan counties. When I first started researching this trip I read that the Stevens-Snoqualmie section of the PCT was one of the prettiest as it had some of the biggest views and most rugged terrain of the entire trail and I was finally privileged enough to witness my first views.
 |
Ok, so my guess is that peak on the left is Lake Lorraine Point
so the earlier pic was probably Thunder Mountain
|
The next view I was rewarded with was of Lake Lorraine Point, at the south-east "opening" of the Trapper Creek Valley.
Finally, I got my first views of the Leavenworth fire, er, Chiwakum fire, and actually, I couldn't see the fire itself, I could just see the smoke from the Chiwakum fire. I'm not exactly where the fire was in the Chiwakum Mountains, but my best guess is that the smoke is about 15 miles away as the crow flies.
 |
| Wait! That's no cloud. That's SMOKE from the Leavenworth fire!! |
 |
When the wind died down for a few minutes,
the smoke went nearly straight up.
|
Finally, I made it to the top of Trap Pass. While the topo map doesn't show it, the last mile or so get's pretty steep and has several switchbacks. This WAS my goal for the day, but when I got there I realized that there was no water anywhere near me. The map showed two small lakes just to the north of the pass. I spent nearly an hour scrambling along the ridgeline looking for the lakes or anything that would point to water. . .no luck. So, I had two options. Trek back down to Trap Lake to grab water for the evening and bring it back up, or go on. It was only around 3 or 4pm and I really didn't want to go back down to the lake only to climb back up to the pass. Onward!!
 |
From the top of Trap Pass. Trap Lake in the foreground.
Grass Lake is the tiny blue lake at the far end of the valley.
|
Immediately south of Trap Pass the trail descends down a long series of very steep switchbacks where it joins with the surprise creek trail. Surprise Lake was about another half-mile down, or I could continue on for another mile or so (mostly flat) and arrived at Glacier Lake. Glacier Lake is much bigger and more isolated than Surprise Lake so I decided, again, to keep on trekking.
|
| Glacier Lake. This was my first campsite |
I made it to Glacier Lake around 6:00 P.M, set up camp, ate some food took some pictures. The lake was beautiful. No wind, not too chilly, only one other person within sight. It was a long, LONG first day, but it was worth it for the spot. I plan on taking Kyra out here sometime next summer for a backpack. When we do, we will take the Surprise Creek trail. (Editor's note: I did take Kyra out here for a backpacking trip in July, 2015)
 |
| Same lake, same shot even. I just took it with a few different exposures. |
Glacier Lake was really pretty, but I couldn't decide on the best photo settings, so I set the camera up on a tripod and took the same photo several times with varying exposure settings.
 |
Three exposures to be precise. Which one do you like most?
Please vote in your comments.
|
 |
| My "camp" at Glacier Lake |
I narrowed it down to these three pictures. Which one do you like best (leave vote in comments below).
My "camp" for the first night was a flat rock right next to the lake. I put by home-made quilt on a Z-Rest and a bug net over the whole setup. It wasn't too bad, a bit hard, but not bad. I woke up at 2:00 a.m. and took probably 50 night shots of the Milky Way, but they were all out of focus so meh to that.
Day 2:
Start Place: Glacier Lake (4,806 ft.)
End Place: Near Waptus Lake (3,200 ft.)
Total Distance: 20+ miles
Hike time: 11.5 hours (6:00 am to 5:30 pm)
I decided to get an early start so I could get up and over Piper Pass before it got hot. It is a lesson I learned on the Wonderland Trail . . .get the climb done before the heat kicks in. I was up sometime around 5:30, had some breakfast, coffee, packed up, and was on the trail by about 6:00 making great time. At the base of Piper pass the trail junctions and disappears. According to the map I had a choice: I could follow the old Cascade Crest Trail due south and over Surprise Gap (red line) or take the PCT around the North and West sides of Surprise Mountain and go over Piper Pass (green line)
. When I hit the "junction" I completely lost the trail. I was starring directly at Surprise Pass, but could not identify any trail leading up and over the pass. On the flip side, I could not see any trail branching off to my right leading up toward/over Piper Pass (the PCT). I had some hesitation about just scrambling up and over Surprise Pass so I turned right and started scrambling up the north east slope of Surprise Mountain in search of the PCT.
 |
| Which way which way. So many choices. . .and I, I choose poorly |
Map in hand, I was constantly checking my location and estimating where I figured the trail would be. After gaining around 200 feet of elevation I looked back/down and STILL could not see where the PCT went from the junction, but I knew where it SHOULD go as it climbed up the mountain toward the pass so I continued scrambling for about another 100 feet where I could finally see the a knoll in the mountain. I was about 90% confident that what I was looking at was on the map and that the trail curved around to the right side (north) just below said knoll so I started traversing north. Lo and behold, about 5 minutes later, BANG, I stepped foot onto the trail.
I know, I know, some of you may be thinking that I'm crazy or how could I not see the trail, or whatever. If that's what your thinking then you are missing the point. At no point was I ever "lost". I knew where I was, I knew where I was supposed to be and I knew of a fixed known location that I could easily get back to, so I was not lost. Rather I was separated from the trail for a little while. Again, I knew where the trail was going and just ended up taking a slightly different way (most of) the way there. Regardless, it is faster to travel by trail so I was rather happy to be back with it.
 |
This is about 2/3rd's of the way up Piper pass just south of Glacier
Lake. That is either Glacier Peak or Sahale in the background
|
A few moments after joining the trail again I hit a switchback and was rewarded with this beautiful view of a valley and Glacier Lake still in the early morning shadow with Mt. Baker in the distance bathed in the morning sun. Actually, I just double checked my maps. Based on where I was standing and the direction I was facing I'm about 90 percent sure that this is actually Glacier Peak. There is a 10 percent chance that it is Sahale. Why didn't I erase my earlier reference to Baker? Because I'm not that kind of person and half the fun of writing this is my guessing what I was looking at. After this trip I came up with a brilliant idea. That idea was to take a picture of the map showing where I am, then take a picture of the bearing I received from my compass sighting, then take a picture of the peak/interesting feature. Armed with that information I am pretty damn sure I will be spot on with my guesses in the future.
 |
Coming down the South Side of Piper Pass.
|
Just after cresting Piper Pass I was rewarded with a great view of the Mountains to the South. I'm fairly certain that the tall peak to the left is unnamed 6,556 (just above No Name and Jade Lakes). Terrace Mountain is to the right which means that Marmot Lake is between the two peaks and the ridge connecting them is just to the South of Marmot Lake. Go ahead, prove me wrong!
 |
Building on my previous assumptions I am now going to say
with some degree of confidence that this is Blue Ridge.
|
Turning to the east a bit I caught a great view of Blue Ridge. All of this is within about a half a mile of Piper Pass.
 |
What I am confident about is that this sign is an indication
that I am on the correct trail! PCT Sign at the top of Deception Pass.
|
Following the trail steadily south the next major landmark was Deception Pass. Really, it's called "Deception Pass" because it doesn't really feel or look like a pass, at least from my approach (read, no climbing to get to here from Piper Pass).
 |
Another sign at the top of Deception Pass. This one indicating that
you would have to be some type of moron to continue.
Whose a good little moron? I'm a good little moron.
|
Well, shit. . .this can't be good. Actually, it really wasn't
sooo bad. My choice was either take this path and do the difficult ford or go an extra nine miles dropping over 1,000 feet into the Cle Elum River Valley (I wonder if that leads to Cabo?), around Hyas Lake then climb back up another 2,200 ft. to Cathedral Pass. I choose the shorter, slightly riskier route that only involved dropping down to 4,000 ft. before climbing up 1,600 feet to Cathedral Pass.
The river ford really was pretty scary. After spending 20 minutes trying to find a "safe" way across the fast moving torrent of a waterfall (sorry, no good pics, I was scared) I finally just decided to walk through the "river" while holding on to what most people would call a twig which I was using as a support to keep me from dying. . .you know typical mountain stuff.
The climb out from the river crossing to the top of Cathedral Pass was one hell of a long (very long) and HHHHOOOOOOTTTTTT climb. The terrain was very exposed, and with the exception of a few small trees, there was no real shade.
 |
Those are either Goat Mountain (peak 1 and 2) or Unnamed Peak
5,866 (near) and is
|
I'm pretty sure that the near peak is Goat Mountain (peak 1) and that the farther snow-covered Mountain is . . . Goat Mountain (the taller part and that is behind Lake Michael). But honestly, I was really hot and tired and cannot remember which direction I was facing. I know where I was standing, but I'm not sure which direction I was facing. Too bad my camera doesn't have a built-in compass. This trip gave me the idea to use a compass when taking pictures. I now shoot a bearing at whatever I'm photographing, take a picture of my compass then take the landscape shot.
These next few shots were taken from near the top of Cathedral Pass looking south out over Waptus Pass. They are all of the same set of peaks, just at different zoom levels. I'm fairly certain that the "front", middle peak is Island Mountain. Initially I thought that the distant peaks on the left were part of Chikamin Ridge, that the peak behind Island Mountain is Three Queens, and the one on the far right was either Four Brothers or Chikamin Peak.
 |
Facing south over Waptus Pass. Assuming middle is Island
Left peaks are part of Chikamin Ridge, then Three Queens,
then Four Brothers or Chikamin Peak.
|
Now, bear in mind that it was a bit difficult to know exactly where I was when I took this photo while looking at a map a few weeks after taking the pictures. To make things more difficult, the map doesn't have the "official" trail through this part. So, while looking at the closer shots I revised my estimate regarding the peaks a bit. I still believe that the "near" middle peak is Island Peak, but based on this shot and looking at the topography of the distant peaks I believe that Three Queens is to the left, Four Bothers is behind Island, and Chikamin Peak is to the right.
 |
Close review, revised estimate. I still believe that Island Peak
is middle/near, but revised. Three Queens is left,
Four Brothers is behind Island, and is to the right.
|
Upon further/final review (more closely zoomed), I stand by my second guess, that Island is front, then it goes (from left to right) Three Queens, The Brothers, and Chikamin. If anyone knows those peaks better than I, please let me know your thoughts.
 |
Ok, closer and final view. I think guess 2 is correct
(Queens, Brothers, Chikamin). Anyone have any thoughts?
|
Hooray! Finally, a peak that I am certain of! The small, close peak to the right is s Seatter (6,857). Just behind is the ridge coming off unnamed peak 7,039. However, I have NO CLUE which peak is the tall peak in the background. Can anyone help me. I'm racking my brain here.
 |
Stuart!!! Yes!!! I know one, finally! That . . is . . Stuart!
C'mon. I DARE ANYONE to tell me that this peak is NOT Stuart.
I've climbed that bitch a few times . . .I KNOW that mountain, biblically. |
 |
| My guess, close ridge is Seatter (6,857). Farther ridge is un-named (7,039) |
Ok, so the question is, what is the ridge/peak like feature between me and Stuart. . .Here is my guess, in the first Stuart Pic (and just off-frame to the right here) is Seatter (6,857) peak. This makes the ridge behind it the un-named 7,039 just South and East of Spirit Lake and just east of Van Epps Pass.
 |
| Deep Lake, my intended campsite for night 2 |
That, is Deep Lake, my intended campsite for night 2 (16 miles from Glacier). Behind Deep Lake is an un-named 6,537 summit. Deadhead Lake is just behind that. And I'm guessing that the peak to the right is 6,506 un-named just off the South-west shore of Deep Lake (also, just above Circle Lake to the Northwest).
 |
| Pretty temperate rain forest just north of Waptus Lake |
What, what is this? Is this a late afternoon shot AFTER the approach to Deep Lake and obviously way past Deep Lake. Well, the truth was, that I was PLANNING on staying at Deep Lake, but I got there around 2:30-3:00 and the place was teaming with mosquitoes. Honestly, it was terrible. I couldn't fathom the idea of staying there for the afternoon and evening being eaten alive, waiting for the mosquitoes to go away. No way, they were horrible. So onward I pressed. This is some nifty green, old growth forest just North of Waptus Lake (I'm traversing West on the PCT along the Northern Shore).
 |
| Campsite, night #2. . . what am I wearing? |
Ahhhhhh. . .Finally, camp for night two. I booked it over 20 miles and man was I beat. There is a little creek just off frame to the left. I made a little pool and probably spent 20 minutes soaking in the ice-cold water. It was cold, but I was too numb to move. Anyway, here's my camp. . .the question you should all be asking yourself is this. . .if all of my clothes are hanging up to dry, what am I wearing???
Day 3:
Start Place: Near Waptus Lake (3,200 ft.)
End Place: Some Lake Somewhere (6,500 ft.)
Total Distance: 12ish+ miles
Hike time: 7.5 hours (6:00 am to 1:30 pm)
 |
| Bears Breast Mountain from the climb out of Waptus Valley |
And this is Bears Breast Mountain. I'm about 90 percent positive on this. The shot was taken on the climb out of the Waptus River/Lake Valley. The valley to center/right is Shovel Creek Valley, with, you guessed it, Shovel Lake at the head of the valley. There is also Spade Lake (get it, shovel and spade) up in that area. I have heard a bit about Spade Lake, but given its remoteness, I can't imagine too many people have been there. Either one, Shovel or Spade would make an awesome, secluded spot. Anyway, back to Bears Breast. . .this looks like a really gnarly/awesome climb. I'm going to have to look up routes. Has anyone done this? You know, another awful thought I'm having is that Bears Breast would make an awesome (albeit dangerous) ski!
 |
| Waptus Lake. You can see my campsite (and STUART) from here! |
And here we have Waptus Lake. Oddly enough, the PCT doesn't actually go down to this lake. It skirts around the lake abut 300 feet above it and then drops down to cross Waptus Creek about 3/4 to 1 mi. west of the lake. Ah, and one more thing. . .look way in the distance. The farthest point you can see is a little peak sticking up just to the right of center . .. .anyone know what it is?? Yeah, it's STUART!!! All hail Stuart!
I want you to pay attention to something. . .notice how sun exposed I am right now? Yeah, there are a few trees here and there, but I'm pretty much being blasted by the sun. Now go back and look at the previous pictures again. I know that a few have some pretty greenery and some shade, but the vast majority of them, especially those involving climbs to passes or peaks, are all completely sun exposed. Let's combine this with 95+ degree heat and 4,000 ft. climbs and you start to see a pattern emerge. Oh, and one more thing. Somehow, for some reason (read over-hot and over-exerted) I was experiencing nausea and vomiting. So, whenever I would drink or eat, it wouldn't stay down. Ever puke pure water? Take it from me, it is
not fun. By the time I took this photo, this has been happening for nearly 24 hours.
 |
Three Queens maybe?
At least I think the three peaks to the left are the Three Queens
as seen from the North
|
And by this time I had become so dehydrated that I stopped sweating. It's not that I wasn't trying to drink water, it's that I couldn't keep it down. You may be asking yourself, "so then why did you keep going, you idiot?" In short, it's because I really had no choice. As you can see from this lovely pic taken from the top of Escondido Ridge looking at what I'm pretty sure is Three Queens, there is no shade. I was tired, and incredibly scared. I was terrified, and was too weak to go any farther. My plan went from, "Climb 1,000 feet then rest" to, "Climb 500 feet then rest" then, "Maybe just climb 100 feet then rest" to finally, "OK, simply walk 100 feet then rest".
I was in bad shape. When I stopped to take the picture of the Three Queens I knew I was in trouble. I took a nice long rest and tried to drink some water, but I was getting pretty delirious and knew that I wasn't going to make it out without some sort of miracle. I pulled out my phone and turned it on. . .no signal, not even a single bar. I tried a phone call anyway, no good. I tried again, no good, I tried a third, a fourth, a fifth time. Nothing. I decided to try texting because sometimes text messages will go through even if phone calls don't. . .no good. I tried again and again and again, nothing.
I could see Horizon Air planes flying over head as they began their descent into Seattle so I pulled out my flashlight and tried to signal them. . .no good. I pulled out my signal mirror and tried the same. . .no good, they were way too high and I'm sure they weren't looking at the ground. I screamed at the top of my lungs, I blew my whistle over and over and over again. Anything to try to get anyone's attention anywhere. . .no good. I was alone, hot, dehydrated, and in the middle of nowhere. I must go on. . .so I did.
 |
| Steve. . .A.K.A. "My Hero" |
MY HERO! I guess I should explain who this "Marlboro Man" is and why he is my hero. Well, as I'm sure you remember (because you just read it). I was hot, confused, and in all sorts of a bad way. I was three days into this damn hike and everything was going wrong. I had the "umbles" (stumbles, mumbles, grumbles), loss of coordination (beyond my usual clumsiness), nausea and vomiting, and was so hot and dehydrated that I was no longer sweating.
It was about this point that Steve, a northbound thru-hiker, found me staggering along the trail mumbling incoherently like a drunk at 3 o'clock in the morning . When I saw him, I collapsed to the ground barely conscious. He later told me he was a little frightened.
He told me that there was a little lake a few hundred feet down the trail, took off my pack, and carried me to the water and set me down in the "cool shade", and put wet clothes on my head and around my neck.
Nothing was said for about 15 minutes when finally Steve pipes up, "So. . .I'm going to sit here and smoke some pot and try to relax." Yeah, we like Steve.
 |
| Look Ma, no shade!!! |
Dammit, even when I'm sick I look good. What I want you to notice here is the complete absence of real shade anywhere. This is it, it is as good as it gets. I was literally in the short shrubbery next to the short, scraggly trees under the tarp, which didn't do much good because there was no wind, not even a breeze. As Cosmo Kramer would put it, "Whew, it's like a sauna in here."
 |
| Out lovely little mosquito infested lake |
This is the little lake that we camped out next to for a day. Very pretty lake. It doesn't have a name but I will always have a special place in my heart. Notice how still and flat the water is. This is at around 5pm. There is NO wind, none at all. And what does hot, humid weather next to calm, standing water bring. That's right mosquitoes! God I hate mosquitoes and they were everywhere. Millions of them, EV-RE-WHERE.
 |
Sunset over Chimney Rock, or as I like to call it:
The $25,000 picture |
Day 3:
Start Place: Some Lake Somewhere (6,500 ft.)
End Place: Kittitas Valley Healthcare Hospital Emergency Room, Ellensburg, WA
Total Distance: 82.6 miles
Hike time: 0.0 hours
Helicopter Flight Time: 0.5 hours
Ambulance Ride: 1.2 hours
ER Stay: 4.5 hours
Ride Home: 2 hours
I slept like a log that night and woke up still very weak. I was able to stand for a few minutes at at time, but couldn't walk more than 50-100 feet, and when I did, I would have to sit down for a while to recover.
 |
Steve again. He is holding his emergency personal locator and
texting back and forth between the SAR coordinators.
It is the DeLorme AG-00987-201 inReach SE. Don't worry,
I have one now. |
I
Steve and I talked over our options over breakfast. We finally had to admit that there was no way I was walking out of there alone. Fortunately, Steve had a satellite beacon (yes, I have one of these now). Even better, his beacon had 2-way text messaging (yes, mine does too). After sending a few cursory messages to his friends and family saying that he was going to call for help but not to worry as he was NOT the idiot in need of help, and around 7 AM, he hit the S.O.S. key calling for help and we waited
And we waited. Around half an hour later we received a text from the Washington State Department of Emergency Management asking what was going on. Our reply: "34 male. Nausea, vomiting, dehydration 48+ hours. EC Mother-in-law xxx.xxx.xxxx.
Don't tell my wife!" Yep, I had my priorities in the right place. Kya was in San Francisco for a job fair. No way was I going to scare her.
 |
| That's not smoke. . .it's a THUNDERHEAD! |
Then we waited again. I'm quite familiar with SAR procedures for some reason and knew that we were in for a long wait. I knew exactly where we were and where the nearest trail head was located. I also knew that the nearest trail head (Pete Lake TH) was around 45 minutes off I-90. So, I knew it would be a minimum hour wait before anyone even made it to trail head to form a command post and start organizing people.
Then the Operations Lead would have to wait for a team of fast packers to arrive and send them off with radios to serve as the point/speed team. Even strong hikers were a minimum of 8-10 hours away (I was nearly 20 miles from the nearest trail head and around 4,000 feet up.
They would keep sending up ground pounders as they worked with the Sheriff's office in an attempt to get a chopper in the air (which generally takes a few hours). We were in for a long day of waiting.
What made things even more fun was the there were scattered thundershowers in the area. Yep, we were stuck on a flat, open area, next to a small tarn (lake) at ~6,500 feet surrounded by peaks/ridgelines listening to nearby thunder. Ever hear of the lightning position?
 |
| Steve again, the tarp is part of our signal system for air rescue |
Finally, around noon we received a message from the DEM stating that they were trying to send out the chopper and we needed to make ourselves visible.
So, I set out my tarp on a flat spot. We set three piles of rocks in the shape of a triangle on to of the tarp.
We then went over to a flat, white rock and set up three piles of black rocks in a triangle on that. I also had a signal mirror (not much good in this weather) and my trusty flashlight.
 |
| Storm clouds. They kept canceling the Helo due to thunderheads. |
Every time the chopper would take off more thunderheads rolled in. This lasted for several hours until finally there was a decent break in the clouds. We could hear the chopper before we could see it and we were ready.
 |
| Yeah!!! Salvation has arrived!!! |
Everything already packed up and ready to go except for my pad and a few other items with which to signal. Once we saw the chopper we did everything we could to be visible, waving our arms, waving yellow pads, and signaling with the strobe (flashlight). While doing this I thought, "hey, this would make an awesome picture" so I grabbed my camera with my right hand while signalling the chopper with my left. It turned out to be my favorite picture from this trip.
The chopper passed above us, went behind a ridge to make a U-Turn, then hovered about 50-100 feet above us as they hoisted down an SMR guy. He talked to us for a few minutes, asked if I was all packed and ready to go then called the chopper back. I was "helo-suited up" as the chopper re-approached, hovered, and dropped the hoist cable. I got clipped on the ascended into the belly of the chopper like a dog into heaven.
It was a 30 minute chopper ride to I-90. I was then transferred via gurney to an ambulance where I was rushed to the hospital in. . .ELLENSBURG!!. Yep, when we called SAR, I was just over the county line in Kititas county so they were required to take me to the hospital in Ellensburg. Even though it was pretty much equal in distance to Seattle from where the chopper landed.
 |
| Obligatory Emergency Room Selfie |
I went through 3 liters of IV fluids while in the Ambulance. I then went through 2 more liters in the ER when finally, I had to pee. . .ewww.
Three more liters, anti nausea meds, anti diarrhea meds, a battery of blood tests, and a Cat Scan later the nurse came in and chewed me the fuck out.
Apparently my test scores were pretty damn scary. I was, obviously, very dehydrated, and malnourished. However, what really scared here were my myoglobin levels. They were dangerously high putting me at high risk for Rhabdomyolysis. What is Rhabdomyolysis? Basically, when muscles break down they release a chemical that is toxic to the kidneys at high levels (myoglobin). If enough of this chemical gets released it can cause kidney damage and potentially acute renal failure (
see more info here). So yeah, nurse was right to yell at
Anyway, to make an already too long story short, I ended up having to call Kyra because I didn't have my insurance information on me. I was hoping to avoid telling her until she got home, but in the United States they don't let you leave the hospital until you agree to go into crippling debt.
Kyra's parents ended up driving out to Ellensburg to pick me up and drive me home. Upon getting home, I (unwisely) hopped in the car, drove to Jack-in-the-Box where I consumed two large Sourdough Jack meals. I then drove to the grocery store where I purchased a large bag of beef jerky, a bag of potato chips, a big bag of Starburst, and three boxes of Ho-Ho's. It was all gone that night. The next morning I drove down to Roxy's Diner and had a tall stack of pancakes, three eggs, hash browns, and a stack of bacon.
Lesson learned. . .no matter how much you know, and no matter how prepared you think you are, something can always go wrong.
If you made it this far. . .I actually mapped it out to illustrate how in the middle of "nowhere" I was located when the tragedy went down.
 |
| "Salvation Lake" |
 |
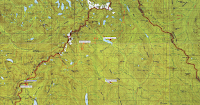
| The red line is the PCT |
 |
| You can see the elevation gain |
 |
| Still no trail head |
 |
| Keep going |
 |
| Wow, that's a long ways |
 |
| Finally, a link to civilization |


