Monday, November 16, 2015

Sunday, Sunset Sunday

This past weekend was the first lazy Sunday that we have had in over two months which was rather fitting given that rather massive storm that rolled through Friday and Saturday.  By mid-day Sunday I was going rather stir crazy and wanted to get outside for a bit. Two things I really love about this time of year are 1) all that rain cleans up the air, and 2) early sunsets mean I can get outside, take some pictures and still get home in time for dinner.

Yesterday was the best of both worlds.  The storm that rolled through all last week did a fantastic job of cleaning the air, and Sunday was a beautiful day with an early sunset and enough clouds rolling in to make an interesting color.  The four of us packed up the car and went down to Golden Gardens. As soon as we got there the sun was nearing the clouds. I quickly got everything ready, went down near the water lined up the shot and within 5 minutes managed to get the best shot of the evening.
Goodness Gracious Great Ball of Fire
ISO100, f/11, 1/400 second

The sun went down pretty quickly after this so I consider myself lucky I got there in time.

Once I got "the shot" I figured I would kill some time playing around. I haven't taken a panoramic shot with this camera and figured I might as well try it out.  To add to the fun, I remember reading that for maximum resolution you should shoot panorama with the camera in portrait mode for a landscape shot and in landscape for a portrait shot. I like the shot, but the sky isn't as interesting as it was 10 minutes earlier, and I find it odd that it looks as if I am standing at a corner even though the sidewalk went straight from my direct left to my direct right. Looking at this makes me interested in trying to create those "tunnel" type panoramas I have seen a few times online.  Maybe I will try to figure out how to shoot/process one of those sometime soon.

Panorama of 11 shots taken in portrait mode.
Full resolution is 19,885 x 5,251 pixels
 Of course, I had to play with my new Rokinon 14mm while I had the chance.  I'm still trying to figure out the best uses for this lense ASIDE from astrophotography (something I have yet had the opportunity to do with this thing).  Two things I noticed from my previous attempt at using this lens: 1) it is difficult to focus, primarily because I never feel that I can get close enough to see enough detail to properly focus; and 2) because this lens has such a wide field of view, you really need something in the foreground to add interest to the shot. To get that "item of interest" I walked down to the water and set up right near a rock.  It was quite the precarious position as the rocks were slippery, I wasn't wearing the greatest of shoes, and I was carrying a camera around my neck.  I spent a few minutes down there and eventually got the shot below.
Composite of three exposures.
I had the damndest time trying to get the rock properly exposed, and still feel that it is quite under-exposed.  In fact, this shot is even a composite of three exposures, one for the sky, one for the water, and one, trying to expose for the rock. Even with the composite, the rock is underexposed. I probably could have gotten it if I was able to take a longer exposure, but there was no way I would be able to hold still long enough, I was slipping all over the place.

What I really want to do is get the shot I saw a few weeks ago from the bus while on the Aurora bridge.  While looking north as the sun was setting, I could see Mt Baker bathed orange reflected off the clouds.  I haven't seen anything like it the entire time I have lived here. It was awesome. I was pretty upset that I didn't have my camera with me, especially given that I brought my camera to work a few days earlier with the intent of taking sunset pictures. Oh well, I'm going to keep my eyes open for similar conditions in the future and figure out how the hell to get the shot.  Maybe I could find someone to let me in to or on top of the the UW tower on Brooklyn. Either that or maybe I can get to the top of the condo tower near there, or Hotel Decco. Regardless, next time I think conditions may be good for that shot, I'm going to find a way to take it.

Saturday, November 14, 2015

Skyscrapers

For those of you who don't know, Kyra gave me a really awesome camera as a "push" present. The upshot is that I now have a really awesome photo setup.  The downside is, due to the timing of said gift, I don't get much time to go out, set-up, and take pictures.  This means that instead of heading out into the mountains to take epic pictures of mountains, stars, sunsets, and northern lights, that I have to stick closer to home.

This has lead me to start exploring urban photography, be it buildings, cityscapes, and urban parks.  My first foray into this world was the oh so well known "Kerry Park" shot of Seattle/Mount Rainier taken during the blood moon.


This opened up a whole new set of opportunities for me.  I realized that I could go out, play with my camera, take some pictures, and still be home in time for dinner. . . or something to that effect. This discovery lead me to what is perhaps my favorite picture to date, the Rizal Park shot. I saw an image on ChromeCast and really wanted to get a similar shot. It was an image taken of Seattle from somewhere south of the city.  It included traffic lights from I-5 swooshing through the city.

I spent a week "scouting" spots on Google street view that would give me the perspective I wanted.  I finally found some potential spots up near Rizal Park.  One Sunday evening, Kyra gave me a hall pass so I packed up the car and drove across town. The first thing I noticed upon arriving at Rizal Park is that it was one sketchy area. I really did not want to set up a couple thousand dollars worth of camera equipment and sit there alone for a few hours waiting for the appropriate lighting.

And now I wait.
Taken from my phone while waiting for the light
I hopped back in the car and drove around a bit.  A few hundred yards down the road I found an entrance to the off-leash dog park. Something told me to check it out, and I'm glad I did. I followed the path for a few hundred yards then noticed that there was a section of fence that had been removed. Not only that, but it happened to be right at the top of a good 15-20ft drop off so there was nothing between me and the view.  I set up the camera, the tripod, took a few test shots, and waited.


About an hour later, the blue hour began and I started shooting.  I wasn't really sure what I was doing, but I know I wanted the car trails so I needed a long exposure without overexposing. Additionally, I wanted to make sure the whole scene was in focus.  To accomplish that I needed to set the aperture at f/22 and let-er-rip.  I ended up with the RAW exposure below.

Zoom Zoom Seattle - RAW file (after cropping)
ISO400, 24mm, f/22, 60 seconds
 Honestly, I was quite impressed with the RAW shot, but wanted to lighten it up a bit, after playing around in lightroom for a little while I ended up with the final product as shown. The single biggest change that I noticed during post-processing was enabling the lens profile. If you flip between the two pictures, maybe you can see it.  To my eye, enabling the lens profile appears to "push" the middle back a bit and "flatten" the image. Anywho, here is the final product.  I really like it and am currently getting it printed on museum-wrapped canvas.

Zoom Zoom Seattle - final product
Specs in previous version, note the change from lens profile
Note, I'm still pretty new, and was even more so when this was taken.  I mentioned that I shot this at f/22 in order to a) keep everything in focus, and b) get a long enough exposure to get great car-trails. What I didn't know at the time was that shooting at high apertures reduces the sharpness of the image. I also didn't realize that you really don't need to shoot at f/22 in landscapes to keep everything in focus. In reality anything from f/9 to f/16 should keep everything in focus without loss of clarity.


Jack provided me with a few ideas on how to accomplish the aforementioned goals, but without loss of clarity.  It involves image stacking and I'll get into the details of that below. However, I forgot to mention a third goal, I wanted to accomplish goals 1 and 2 using a single RAW file so image stacking is kind of meh. Actually, now that I think about it, I think I may have a solution. . .neutral density filters. I can stop up, toss on a neutral density filter, and take the shot.  It may work, it may not, but I can try it.

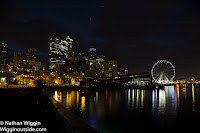
I had fun with my first blue hour photography session and couldn't wait to get out and try another one, but from where?  I didn't want to repeat the same shot, but I still wanted something "Seattle". The city had recently opened a Giant Ferris Wheel along the water front and I really liked the idea of getting a shot of the Ferris wheel in front of the city skyline. After a few days of Google-foo, Nicole told me that Piers 62 and 63 were public access and had unobstructed views of the Sound and the City.  I took off from work an hour or so early and ran down to the pier to take a look for myself and take a quick test shot to see if I could fit the scene in the frame; everything looked good, I had the scene, now I just had to get down there.

The next morning I received a push notification from my Star Walk 2 app indicating that Venus, Mars, and Jupiter would be very close to each other in the next few days and that the best time to view them would be a few hours before sunrise. I thought this was perfect and called my friend Dan o see if he wanted to wake up very early on a Saturday morning to take some pictures of the city and planets.

The morning arrived, I picked up Dan around 5am and we headed downtown to the water front.  Venus, Mars and Jupiter were VERY visible so I figured this would be a great morning. As I mentioned earlier, Jack gave me the idea of taking multiple exposures, each with varying objectives, then combining them in Photoshop to create the final image.  I figured this would be a great time to try it. My goal was to get a blue hour shot of the skyline with and the planets.  To do this, the plan was to get three exposures, the first, exposed for the planets, the second for the city lights, and the third for blue hour.  The three exposures are below.
Exposed for Planets
ISO 100, f/9, 100 seconds
Exposed for Buildings / Sky
ISO100, f/6.3, 9 second
Exposed for City Lights / Sky
ISO100, f/14, 14 seconds

I took the three exposures, stuck them in PhotoShop and performed a variation of the Lighten blend mode, called "Screen".  According to the Adobe webpage, Screen looks at each channel's color information and multiplies the inverse of the blend and base colors. The result color is always a lighter color. . .The effect is similar to projecting multiple photographic slides on top of each other. the resulting picture, Morning Star, is below.
Morning Star
The three above, imported to Photoshop, blend mode set to "Screen"
After a successful "blue hour" I was feeling pretty good and figured that we should stay there throughout the morning and see if I could capture a good sunrise photo.  The difficulty with capturing any type of shot, sunrise, sunset, etc. is that if you expose for the sky, to get the pretty colors, then you underexpose the foreground; in this case the buildings.  If you expose for the buildings, then the sky gets washed out, or at a minimum, you loose the color detail.  So, I thought I would try another multiple exposure-blending. The two shots below were taken about 90 seconds apart, the first exposed for the sky, the second exposed for the buildings/foreground.

Da Buildings
ISO100, f/11, 1/8 second
Da Sky
ISO100, f/13, 1/20 second


The two shots below were taken about 90 seconds apart, the first exposed for the sky, the second exposed for the buildings/foreground. I imported these into Photoshop and tried all of the various auto-blend modes, but none of them worked out so I ended up doing it manually using layer masks. The result, Smoky Sunrise, is below.

Smoky Sunrise
The two above imported to Photoshop, manual blending
I hope you enjoyed reading about my first forays into cityscape photography.  I learned a lot over the few photoshoots Every time I go out, I learn a lot and have a lot of fun.  these were some of the more challenging post-processing shots so far. Additionally, they took the most time on a per-shot basis, but I enjoy it.  Given the new baby and the now rainy weather, I have the feeling that I'll be sticking close to home for a while.

Monday, November 9, 2015

Glass, Grass, and . . .

My parents came to visit a few weeks ago and my mom really wanted to go to the Chihully Glass Museum.  I looked it up and thought it would be a pretty neat opportunity to practice taking pictures in a very unique setting. The glass museum is nestled right next to the Space Needle and I was trying to figure out how to get some spiffy pictures, perhaps including the Needle itself, however, I didn't want it to seem too cliche as I find way too many shots of the Needle and don't find them very interesting.

My original thought was that we could head to the museum right around sunset and that would give us the opportunity to do some shots during the blue hour.  However, I read on the FAQ that they do not allow the use of tripods or monopods so that was a bit of a bummer, that and we had a busy day and I knew we would be hungry before sunset/blue moon. And I knew no one else would want to spend hours here waiting for the sunset.  So, I scoured Google Maps/Street View trying to look for a cool vantage point or cool picture.  You can even do a mini tour of the museum so I was clicking through rooms looking for something inspiring.  Unfortunately nothing struck so I was headed in without any real game plan.

As we toured the museum I felt kind of strange. Sure, there was all of this beautiful glass work and some of it was fun to photograph, but there were so many people in there and so many people with cameras that I felt a little out of place and overwhelmed.  Even so, I managed to snag a few pictures worth sharing.

Glass within Glass within Glass
ISO 1600, 1/80th second, f/4.0
The Glass Forest
ISO 1600, 1/10th second, f/4.0


Party Bowls
ISO 1600, 1/6th second, f/4.0
Glass Boat
ISO 3200, 1/25th second, f/4.0


Once we got outside things started to change. It was a bit chilly and a bit breezy so there weren't that many people outside.  That and there was just more room, and the light was better. . .well more familiar to me and and easier for to shoot. I was wandering around looking for some way to capture the space needle when I noticed that the sky looked rather nice. I turned west to try and capture some sunset/sky pictures, but the building was in the way and nothing turned out.


Swirled Reflections
ISO 200, 1/10th second, f/4.0
Sewing with 5 Needles
ISO 1000, 1/50th second f/4.0
Just then I looked down and noticed the rather large glass globes situated all over the place.  As I walked closer I realized that I could see the reflection of the Space Need in the ball.  Ah hah!! There was my shot, a great way to get a photo of the Space Needle and the glass art at the same


Two Big Balls and a Loooong Needle
ISO 800, 1/30th second, f/5.0


I spent the majority of the next hour wandering around outside looking for different glass objects from which to capture the reflection of the Space Needle.


Glass Nymph
ISO 800, 1/40th second f/5.6
The Units
ISO 800, 1/20th second, f/9.0
Oh, and I also found a pretty spiffy log too.

OhYeah, HI MOM AND DAD!! 


Sunday, November 8, 2015

Boo!

Sorry for the delay between posts. As I mentioned in an earlier blog, taking care of a new baby takes most of my time; I actually work all day while at work, then when I get home, Kyra hands over Andrew so that she can finally take a break and do the things she wants to do. Andrew is still young (just turn two months today) so he doesn't really go to bed too much earlier than we do (if at all). When he does go to bed, Kyra and I are exhausted and barely have the energy to lie on the couch before going to bed ourselves.

But I digress. There was a huge full moon a few weeks ago, but I didn't really notice until I went to take out the trash on evening.  I walked outside and though "ohhh, that's cool".  I went back upstairs grabbed the camera and stood in the middle of my street taking shots of the moon. The idea was to bracket the moon inside a hole in some trees. However, I was trying to do this handheld while standing directly under a streetlight. . .it didn't work out, but it gave me an idea. Fortunately, Kyra was kind enough to let me go out for a little while, so I grabbed my camera and tripod and headed out to Woodland Park (which is just down the street).

Unfortunately, by some clouds moved in and I wasn't able to get a crisp picture of the moon.  Fortunately, the clouds created an eerie atmosphere.  I set up the camera in the parking lot, framed the moon between the split trunks of a tree, and fired away. I took a variety of shots and really liked the one below.

I finally got around to posting this around Halloween and thought it would be a fun idea to shop in a "scary face".  After searching for "evil round face" I found the perfect one, and wouldn't you know it, I didn't even have to re-size the face to make it fit.  So, enjoy. . .I'll try to post more as I have some from the Chihully Glass Museum and a few more from Carkeek Park.


Friday, October 16, 2015

Over the Sound and through Bainbridge, to (great) Grandmother's House We Go

It's hard to really get out and do things with a newborn! Over the past summer, Kyra and I used to go hiking or backpacking nearly every weekend.  Hell, we did Granite Mountain two weeks before Andrew was born (sorry, no pictures) and then did Annette Lake only three days before Kyra was born.

Then, came the baby, and the lack of sleep (oh lord, the lack of sleep). Going out with a newborn is tough and involves a lot more planning and flexibility than even I thought it would be. So, we really didn't do much for the first few weeks.  But we were getting cabin fever and had to get out.

We decided on Discovery Park because it is close, it has a fair amount of trails,I have never been there, and there is a lighthouse which I hoped would make for some interesting pictures. I had a goal - I wanted to grab a few shots of the lighthouse.  One with the sun "in" the lighthouse and maybe a few golden or blue hour shots.

  • Baby? - Check
  • Car Seat? - Check
  • Baby Carrier? - Check
  • Diaper Bag? - Check
  • Tasha (Dog)? - Check
  • Camera gear? - Check

Off we go!

I didn't know what to expect and I was pleasantly surprised.  The park is very well maintained with a great combination of open spaces and "forests".  The best part is that it is huge so it never felt very crowded--nothing like the Snow Lake trail.  Hell, for being in the city it was downright lonely.  I liked that.

Taken just inland of Sand Point Beach on the Olympic Coast (4th of July)
1/125 second f/2.8 ISO 125 (taken on my Lumix FZ1000)
I used to only like taking pictures of "big views".  You know, from a mountain peak or pass looking out across a large landscape (you will see plenty of these if/when I finally get around to publishing my Stevens to Snoqualmie story), but I have grown to appreciate other pictures, specifically ways of playing with light.  A fair amount of this new interest is owed to my good friend Jack, who has helped spur my photography interest and knowledge in several ways.  On our 4th of July trip to the Olympic Coast he taught me some things to look for when hiking through (what I thought was) a boring forest which resulted in one of my favorite all time pictures.

It was a very clear and bright day, which I'm learning means not-so-interesting pictures because there is not much color in the sky to serve as an interesting backdrop.  So, sadly none of my "big view" pictures turned out very well.  However, I was able to find a few interesting spots along the trail with the sun peaking through leaves or between trees and had a bit of fun playing with these.

Trail along Discovery Park in Seattle
1/60 second f/20 ISO 800
This first shot was hiking north along a bluff along a nicely shaded section of trail.  I had been keeping an eye out for something similar to my favorite Olympic Beach photo and this looked like a good spot.


I had red somewhere that using really high f-stops would result in star-burst type patterns.
My old Lumix FZ1000 only went to f/8 or f/9 on the high end so while it was great for taking landscape photos, I was never able to play with this effect.  So, I decided that for these "sun peaking" shots that I would stop it up to 20 and see what happened.  I liked it and in this situation it pulled off exactly what I was going for.

Trail along Discovery Park in Seattle
1/125 second f/11 ISO 800
We continued followed the trail as it veered west and dropped in elevation toward the Sound / Lighthouse.   As we dropped we entered a more heavily forested area with fairly tall and nicely spaced trees. Hoping to re-create the lovely Olympic Park shot, I stayed here for a while and took several shots.  I noticed a few things while standing
here.


There is a lot of contrast so if I would point the camera toward the sun everything else would be way underexposed.  If I pointed the camera at the trees or the ground, those would be exposed properly, but the sun and trees would be way over-exposed. I was having a tough time at getting a good exposure, and bracketing the shot really wouldn't work because I was handheld (and I'm not very good at blending layers in Photoshop as you will see below).  I was starting to get Frustrated then remembered Galen telling me that I can do an exposure lock by pressing the * button on the back of the camera.  Re-armed with this knowledge I took several shots exposing on different areas then pointing the camera at the sun and taking the shot.  Honestly, while I'm not too impressed with how it turned out, it was a fun learning exercise.

"Final" Lighthouse shot composed of 2 layered exposures
We made it do the lighthouse WELL before sunset.  I was pretty sure that we weren't going to be able to hang out until the sun went down (remember me saying going out with a newborn is difficult), so I was falling back on my idea of getting the sun "in" the lighthouse so it looked like the lighthouse was on.


Andrew had different plans.  While I was waiting for the sun to go down he managed to eat, twice, and poop. . .three times.  We were out of diapers and had a very unhappy baby. I was able to convince Kyra to give me 5 minutes so I could try taking multiple exposures and blending them in Photoshop (thanks Kyra!).

I took three exposures all at f/22, ISO 100. The first was to expose for the sun, the second for the foreground, and the third for the shadows.  In the end I only ended up using the first two.
RAW Shot exposed for the sun
1/100 second f/22 ISO 100
RAW Shot exposed for foreground
1/10 second f/22 ISO 100


Lessons Learned:

While taking and processing these pictures (RAW images below for anyone interested) I noticed a few interesting things about high f-stops.  The first is that they under-expose quite a bit you really need to lengthen the exposure time (couldn't do while handheld) or crank up the ISO which adds a bit of noise.  The second lesson is that you lose clarity/sharpness.  While that isn't too noticeable in these pictures, it was fairly noticeable in some photos that I didn't process, and can also be noticed in my yet-discussed SODO blue hour photo (to come). Also, in less-than-bright lights I ended up with a fair bit of camera shake if I didn't crank the ISO.

Exposure lock is a good tool if you are handheld and shooting in strongly contrasted lighting situations.

Luminosity masks are very helpful.There are a lot of extensions and I learned a bit about luminosity masks while trying to combine the lighthouse exposures.  The concept is pretty cool, and using luminosity masks is actually quite easy to do, but very difficult to do right and make it look good. I by no means claim I did it correctly, nor made it look good in my lighthouse shot, but it is a learning experience.  I am going to try similar shots in the future to practice.

RAW shot.
As you can see, the lower half is fairly under-exposed. It wasn't that big of a deal as I didn't really  want to capture the roots, I was more interested in the sun and the leaves. Post processing consisted of cropping and highlighting the image.

RAW shot.
Similar to the one above, even when playing with exposure lock I couldn't quite get enough light from the trees.
Additionally, even though this was f/11 instead of f/22, I still think that the sun starburst is a bit strong. Oh well
Post processing was cropping and highlighting.

Have to slip in a picture of Kyra (and Andrew, though you can't see him).
I love you Kyra!


Friday, October 2, 2015

My Not-So-Super Eclipse Experience

For those. . .not in the know, there was a super lunar eclipse on September 27th, 2015 (this past Sunday). I was pretty excited and thought it would be a great opportunity to test out the new camera that my wonderful wife, Kyra, got for me.  So I did some research and found this website which was tremendously helpful and gave me the awesome idea of doing a stacked shot (like the one below). The idea was to set up and take the shots from Kerry Park, one of the more famous picture spots in Seattle.

What I was TRYING to get. Photo credit: Fred Espenak http://www.MrEclipse.com 

Armed with this knowledge, I did all the calculations and prep work I could do at home. I printed out the exposure guidelines, I used the PlanIt for Photographers app on my phone to "preframe" the shot, and I tested out my camera, tripod, and intervalometer to make sure all of  my equipment worked.

Finally, the big day arrived.  The golden hour started around 6:15, moonrise was around 7:00, the blue hour began around 7:15 and the maximum eclipse was scheduled at 7:47. I knew it was going to be busy so I arrived around 5:30 to a pretty packed house, found a place to squeeze in, got everything set up, and waited.

I took a few shots of the city during the golden and blue hours, only one really turned out, but they were primarily to test the composition and to get the one good shot to use as a base layer for the image stack.

Blue Hour Seattle From Kerry Park: 60mm, 25 second exposure, f/22 ISO 100

At around 7:30, I realized that the moon was supposed to be up, but I couldn't see it.  I pulled out my trusty compass to verify the direction of the moon rise, set it to 90 degrees. . .and ended up staring directly into a building. A TALL building.  I double checked my app and found out that the moon wouldn't be be past/above the building at around 9:30, well past the eclipse.

Well, crap! There goes my idea.  I didn't want to just pack it in, so after thinking it over for a few minutes I figured that the best place to go would be West Seattle. I hopped into my car and raced across town, parked illegally at Salty's (sorry), grabbed my tripod and set up by the water.  The overall framing of the pictures wasn't that great as the moon was really pretty far South of the city, but at least I could fit it all in the frame.

I started by taking a few close-up shots, of which one turned out fairly nice.  I was looking for some way to frame the moon, but there really wasn't anything around. Yeah, that's the top of a very scraggly tree in the bottom right, and the glow is from the lights on Harbor Island. All in all, for a hurried drive across town to even see the damn moon, I'm not too upset.
The Moon from the parking lot of Salty's in West Seattle. 105mm, 4 second exposure, f/4.0, ISO 400

After going for a few close-up shots of the moon, I recomposed the shot in an effort to get Seattle and the moon at the same time and ended up taking several shots.  By this point, I was no longer thinking about shooting in constant intervals to stack, I was just playing with different aperture, ISO, and shutter speeds seeing what I could do.  After taking around 70 shots I ended up with about 4 that I thought were worth saving and post processing.

One of many shots that I thought turned out OK.  This is actually the backdrop to the entire stack.
24mm, 4 seconds, f/4.0, ISO 400

Another one. Yeah, I know that it is very underexposed, but I found I personally enjoyed how the city lights look when the rest is underexposed. 24mm, 10 seconds, f/8.0 ISO 400

24mm, 15 seconds, f/8.0, ISO 200

Very dark, but personally, I think this has the sharpest city lights.
24mm, 8 seconds, f/11.0, ISO 400


It was only after the fact, way after the fact (in fact?) that I realized I took enough photos to do some type of stack that would allow me to see the transition of the moon out of eclipse state.  So, I went back to the drawing board and reloaded all of the RAW files from the camera (when I reject photos I generally delete the RAW files as well to save space. If I reject a photo, I reject a photo).

I then filtered through these files for ones that showed the progression of the moon at the appropriate (enough) intervals.  Once identified, I exported those photos into Photoshop as layers and did the whole mask layers thing to make each moon appear.  For a first attempt, it turned out alright.  The biggest issue is that I was taking each of these photos with an eye on the city skyline more so than the moon and in some cases ended up with either a slightly over exposed moon, or the moon noticeably moving in the shot.  Oh well, better that I tried, had fun, and learned something than just give up when things didn't turn out as planned.

The final stack.  Not too shabby for an afterthought.  It was fun and I can't wait for another opportunity to try something like this again.

Lessons Learned:

  1. When possible, SCOUT THE LOCATION BEFOREHAND!!!  This is especially true when dealing with incredibly rare events such as a super-blood-moon eclipse.  Had I gone out to Kerry park a day or two before the eclipse and watched the moon rise (or at a minimum pulled out my compass) I would have immediately known that the location would not work.  Unfortunately, due to new baby and wedding shenanigans I was unable to do this.
  2. When you make a plan to take a specific type of shot, stick to that plan.  This is in reference to the moon-stacking shot.  I planned to do the stacking shot, then forgot about it when I drove across town and ended up with fewer exposures, and improperly exposed for the moon.  Had I stuck to the plan of a multiple-exposure shot then I would have captured the full eclipse, more moons, and each moon would look better.
  3. Be flexible.  I know, I know.  This flies in the face of the second lesson, but it is an important one anyway.  I could have stayed at Kerry park all night and not gotten much of anything.  It was my willingness to leave that got me something at least.  However, it would have been better had I pre-picked an alternate location before hand. . .so perhaps the lesson should be
  4. Have a backup plan for when things don't end up as planned. And, finally
  5. Have fun and learn something.  After all, isn't this why anyone has a hobby, to have fun and learn a new skill.  If you keep getting upset and frustrated because things don't turn out perfectly, you will never do anything.  Mistakes are part of the learning process.  I can guarantee that I won't make these same mistakes the next super-blood-moon eclipse. . .in 18 years :)

Sunday, September 27, 2015

Galen and Jagoda Got Married (FINALLY)!

After five years together, Galen and Jagoda got married on September 26. I, for one, have to say, "it's about damn time".  Prior to the wedding, Galen told me that he was going to give me his flash and let me play with it.  He claims that it is a really nice flash, but to be honest, I have no idea as I have NEVER used a flash before and wasn't sure what to expect.  Well, actually, that's a lie. I thought that a flash would let me take pictures in low light, holding the camera, and with shutter speeds fast enough to actually capture things without constant blurring.  I was only sort-of right.

I didn't get my hands on the flash until a few hours before the wedding and I didn't even know what type of flash it was.  Add to this that Kyra and I have a newborn and I didn't even get the chance to do some quick Googling (er, Binging) on how to take flash photography. Really, I just didn't think it would be too hard.  Point camera, turn flash on, and BOOM flash lights up subjects and you get a pretty picture.

Boy, I was doing something wrong, and after hours of playing, I'm still not sure what. I felt that I had very long exposure times and I had to crank the ISO pretty high to avoid constant motion blur in most of my pictures (indoor at least. Outside we had pretty decent light for most of the wedding so those were nice).

I would like to provide some context behind each of the shots, but the whole thing was a constant experiment, trying to take the same photo with 5-6 different settings, and then looking through them to see which one worked best and why.  Adding to this, several pictures were taken by other people wile I was tending to baby Andrew, or Kyra, or the bride, or the groom.

Oh yes, lessons.
1) Do some reading/research on how to turn the flash on and get it to work. This is a lot easier when you have the flash at home with you and you have some time to play. Some of them, well, this one at least, had about 10 buttons, dials, and knobs.
2) General rule, your subjects need to be pretty close. I tried "sniping" some photos and it didn't work at all.
3) I got better results when I used the exposure meter/lock. Basically, I told the camera to read/lock the exposure, this caused the flash to go off very briefly providing the camera with the approximate lighting conditions for when you actually take the picture.
4) Use some method to defuse the light.  Flashes are pretty bright/harsh and if you point them directly at the subject you get really odd contrast so you need some way to defuse the light. Most flashes come with a chintzy piece of plastic that works decently well, but you don't have to stop there. In a few of these photos I tried bouncing the flash off the wall behind me which works pretty well when you have a white wall and your subject is really close. I can tell from personal experience that it doesn't work so well when you have glass windows behind you.
5) Low light (well, at least THIS low light) creates a really warm look. A little too warm in my opinion. In most RAW files, the subject's skin was orange/red so I ended up reducing the temp a fair amount on the indoor shots to make people look like people, rather than Oompa-Loompas.
6) If you have a newborn, take lots of photos of the baby, and try to get at least one incredibly embarrassing photo of your wife to post on a blog she will probably never read :)
7) Don't hire me to do your wedding photos. Hire a professional who knows what he/she is doing.

So, without further ado, I will post some of my favorite photos below and maybe give a sentence or two about why I chose to put them here.  There are more pictures on my Facebook page, you know, cause it's Facebook and I need to tag people.

I like the color. I feel that the green provides a great contrast with Amy's dress. I also prefer candid photos over posed.

I know I know. I complained about not liking low light because it makes things look too warm. However, I like this photo BECAUSE it looks nice and warm.  But trust me, I had to cool it off quite  bit to get here.

Of course I like this photo, it's my wife and my kid damnit! 
Awwwww


Look! It's me! I'm not sure who took this, but I like it because I'm selfish.

This was taken outside, under a canopy so the light was really well defused and the grey brick background made for a fantastic exposure.
Again, I'm a fan of green. The other thing I like about this is the composition. I like the space between the subjects and how they each fill the outer third of the frame. Interesting note, Kyra doesn't like this shot specifically for the reason I like it.  She says that her eye is drawn to the center and that having the subjects on the edges is a little distracting.
THE BRIDE!  I told Jagoda that I was going for an ass shot. Instead I got the "you can do it" girl WITH the ass shot.  You go girl!

Awww, how cute. The fun thing about this shot is that it was taken during the maid-of-honor's toast and it was of all three of them.  However, when I put it on the bigger screen I realized that including the MoH was distracting, so, I cropped her out.
Obligatory "terrible" photo of Kyra. Why is this here? Because I think it is funny and she will probably never see it.