This has lead me to start exploring urban photography, be it buildings, cityscapes, and urban parks. My first foray into this world was the oh so well known "Kerry Park" shot of Seattle/Mount Rainier taken during the blood moon.
This opened up a whole new set of opportunities for me. I realized that I could go out, play with my camera, take some pictures, and still be home in time for dinner. . . or something to that effect. This discovery lead me to what is perhaps my favorite picture to date, the Rizal Park shot. I saw an image on ChromeCast and really wanted to get a similar shot. It was an image taken of Seattle from somewhere south of the city. It included traffic lights from I-5 swooshing through the city.
I spent a week "scouting" spots on Google street view that would give me the perspective I wanted. I finally found some potential spots up near Rizal Park. One Sunday evening, Kyra gave me a hall pass so I packed up the car and drove across town. The first thing I noticed upon arriving at Rizal Park is that it was one sketchy area. I really did not want to set up a couple thousand dollars worth of camera equipment and sit there alone for a few hours waiting for the appropriate lighting.
 |
| And now I wait. Taken from my phone while waiting for the light |
About an hour later, the blue hour began and I started shooting. I wasn't really sure what I was doing, but I know I wanted the car trails so I needed a long exposure without overexposing. Additionally, I wanted to make sure the whole scene was in focus. To accomplish that I needed to set the aperture at f/22 and let-er-rip. I ended up with the RAW exposure below.
 |
| Zoom Zoom Seattle - RAW file (after cropping) ISO400, 24mm, f/22, 60 seconds |
 |
| Zoom Zoom Seattle - final product Specs in previous version, note the change from lens profile |
Jack provided me with a few ideas on how to accomplish the aforementioned goals, but without loss of clarity. It involves image stacking and I'll get into the details of that below. However, I forgot to mention a third goal, I wanted to accomplish goals 1 and 2 using a single RAW file so image stacking is kind of meh. Actually, now that I think about it, I think I may have a solution. . .neutral density filters. I can stop up, toss on a neutral density filter, and take the shot. It may work, it may not, but I can try it.
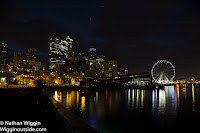
I had fun with my first blue hour photography session and couldn't wait to get out and try another one, but from where? I didn't want to repeat the same shot, but I still wanted something "Seattle". The city had recently opened a Giant Ferris Wheel along the water front and I really liked the idea of getting a shot of the Ferris wheel in front of the city skyline. After a few days of Google-foo, Nicole told me that Piers 62 and 63 were public access and had unobstructed views of the Sound and the City. I took off from work an hour or so early and ran down to the pier to take a look for myself and take a quick test shot to see if I could fit the scene in the frame; everything looked good, I had the scene, now I just had to get down there.
The next morning I received a push notification from my Star Walk 2 app indicating that Venus, Mars, and Jupiter would be very close to each other in the next few days and that the best time to view them would be a few hours before sunrise. I thought this was perfect and called my friend Dan o see if he wanted to wake up very early on a Saturday morning to take some pictures of the city and planets.
The morning arrived, I picked up Dan around 5am and we headed downtown to the water front. Venus, Mars and Jupiter were VERY visible so I figured this would be a great morning. As I mentioned earlier, Jack gave me the idea of taking multiple exposures, each with varying objectives, then combining them in Photoshop to create the final image. I figured this would be a great time to try it. My goal was to get a blue hour shot of the skyline with and the planets. To do this, the plan was to get three exposures, the first, exposed for the planets, the second for the city lights, and the third for blue hour. The three exposures are below.
 |
| Exposed for Planets ISO 100, f/9, 100 seconds |
 |
| Exposed for Buildings / Sky ISO100, f/6.3, 9 second |
 |
| Morning Star The three above, imported to Photoshop, blend mode set to "Screen" |
 |
| Da Buildings ISO100, f/11, 1/8 second |
 |
| Da Sky ISO100, f/13, 1/20 second |
I hope you enjoyed reading about my first forays into cityscape photography. I learned a lot over the few photoshoots Every time I go out, I learn a lot and have a lot of fun. these were some of the more challenging post-processing shots so far. Additionally, they took the most time on a per-shot basis, but I enjoy it. Given the new baby and the now rainy weather, I have the feeling that I'll be sticking close to home for a while.


No comments:
Post a Comment